WARNING : මෙහි ඇති pictures මත click කර විශාල කර බැලිය හැක.internet නොමැති අවස්ථාවලදී පවා මෙම tutorial කියවීමට අවශ්ය නම් "crt + s" click කර save කර ගන්න.එවිට internet නොමැති විට පවා පහසුවෙන් මෙය කියවිය හැක.

3. Ground & Texture

02.Open up the next stock image; GrungeTexture1

03.Drag and drop it into your newly created GROUND folder.


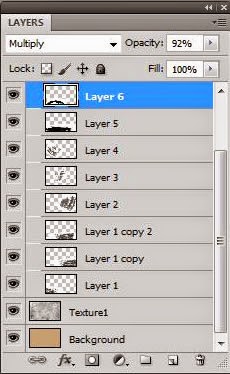
04.Set the blending mode to Multiply

05.Free Transform and position the texture to the bottom left and drop the Opacity in the layers window to about 80%.


06.Duplicate the texture layer (Command/Ctrl-J), and drag it to the other corner.


07.Go to Free Transform > Flip Horizontal...


08.Stretch and position the texture layer to cover some more ground.

09.Hold Command/Ctrl-Alt to duplicate that layer again.
.jpg)
10.Move the layer slightly to the left.

11.Free Transform to stretch the layer as it overlaps the texture underneath.

12.Open up BrushStrokes01 texture file.

13.Make a selection with the Rectangular Marquee Tool (M).

14.Hold Command/Ctrl, and drag and drop it into GROUND folder once again.


15.Use Free Transform > Flip Horizontal...


16.Stretch and skew it to fit to the right of the motorbike rider.

17.Set to Multiply and drop the Opacity to 56%

18.Take the same selection from BrushStrokes01 sample again.

19.Drag and drop it onto your painting.
.jpg)
20.Free Transform and position it behind motorbike rider once more.

21.Set to Multiply.


22.Also drop the Opacity to 49%

23.Roughly Erase (E) where it overlaps the motorbike rider.

24.Sample BrushStrokes01 one more time and drag it onto your painting.

25.Use Free Transform and rotate it and position it to the left of the motorbike rider this time.


26.Again, set it to Multiply and drop the Opacity down to 50%

27.Erase away where it overlaps the motorbike rider.
.jpg)
28.Open up SplatterSmear01 paint texture.

29.Desaturate it (Command/Ctrl-Shift-U).

30.Open up Levels (Command/Ctrl-L) and adjust until all the grey is just about solid black.


31.Drag and drop the whole image onto your painting.

32.Free Transform and angle it clockwise to flip it upside down.


33.Stretch horizontally to fit along the ground.

34.Set to Multiply.

35.Bring the Opacity down to 85%


36.Now open up SplatterThickPaint02 asset.

37.Desaturate the image (Command/Ctrl-Shift + U).

38.Adjust the Levels (Command/Ctrl-L) and bring it down to black.


39.Drag and drop it onto your painting.

40.Use Free Transform again.

41.Now Flip Horizontal.

42.Position the layer toward the front wheel of the bike.

43.Set it to Multiply.
44.Drop the Opacity to around 90%

45.Duplicate the layer (Command/Ctrl-J).

46.Move up and position the duplicated layer near the rear wheel.

47.Free Transform and scale it up a little.

48.Duplicate again (Command/Ctrl-J)


49.Free Transform > Flip Horizontal...
32.Free Transform and angle it clockwise to flip it upside down.
33.Stretch horizontally to fit along the ground.
34.Set to Multiply.
35.Bring the Opacity down to 85%
36.Now open up SplatterThickPaint02 asset.
37.Desaturate the image (Command/Ctrl-Shift + U).
38.Adjust the Levels (Command/Ctrl-L) and bring it down to black.
39.Drag and drop it onto your painting.
40.Use Free Transform again.
41.Now Flip Horizontal.
42.Position the layer toward the front wheel of the bike.
43.Set it to Multiply.
44.Drop the Opacity to around 90%
45.Duplicate the layer (Command/Ctrl-J).
46.Move up and position the duplicated layer near the rear wheel.
47.Free Transform and scale it up a little.
48.Duplicate again (Command/Ctrl-J)
49.Free Transform > Flip Horizontal...


50.Position the layer closer to the back wheel this time.

51.Finally, Free Transform one more time, and use Warp to give it some curve.

52.Time to give it some color. Open up the Hue/Saturation menu by going; Image > Adjustments > Hue/Saturation (Command/Ctrl-U)

53.Set it to Colorize in the Hue/Saturation window.

54.With these color settings, give the paint splatter a nice red/brown hue.


55.Drop Opacity down to 85%

56.Finally, erase away where the red overlaps the motorbike rider illustration.

part 3 එකත් ඉවරයි යාලුවනේ....part 4 එකේදී මේකේ ඉතුරු ටික හදන විදිය බලමු එහෙනම්.එකේදී Splatter Effects එක හදන විදිය තමයි කියල දෙන්නේ.ඔන්න එහනම් මං ගියා....
Photoshop වලින් Watercolor and ink Photo Effect එකක් හදමු....Part 2 එකට,

Photoshop වලින් Watercolor and ink Photo Effect එකක් හදමු....Part 1 එකට,
53.Set it to Colorize in the Hue/Saturation window.
54.With these color settings, give the paint splatter a nice red/brown hue.
55.Drop Opacity down to 85%
56.Finally, erase away where the red overlaps the motorbike rider illustration.
part 3 එකත් ඉවරයි යාලුවනේ....part 4 එකේදී මේකේ ඉතුරු ටික හදන විදිය බලමු එහෙනම්.එකේදී Splatter Effects එක හදන විදිය තමයි කියල දෙන්නේ.ඔන්න එහනම් මං ගියා....
Photoshop වලින් Watercolor and ink Photo Effect එකක් හදමු....Part 2 එකට,
Photoshop වලින් Watercolor and ink Photo Effect එකක් හදමු....Part 1 එකට,

0 comments:
Post a Comment